|
You can make this simple back packing stove with
little cost ($0.25 US).
What You'll Need
 Parts
List Parts
List
- 2 Aluminum Soda Cans - Free
- 1/4 cup of Perlight (found in the gardening department) - $1.75 bag
US
- Wire Coat Hanger - Free
- De-Natured alcohol (found in the paint dept. or boating supply) $3-4
Qt.
Tools
- Scissors
- Drill
- 1/16" (2 mm) Drill Bit
- Wire Cutters
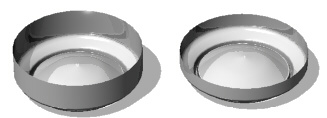
Step 1
For the base, neatly cut one can about 1 1/2" (3.5cm) from the bottom.
For the top, cut the other can about 1" (3.5cm) from the bottom.
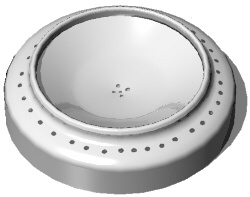
Step 2
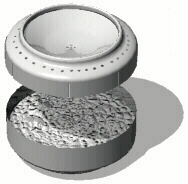
Drill a number of holes (18-30) around the edge of the top and in the
center as shown; use a 1/16" drill bit.
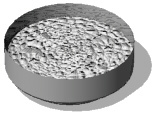
Step 3
Fill the base with Perlight, just more than half full.
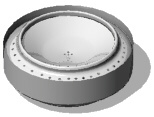
Step 4
Make 6-8 vertical cuts around the top. Make the cuts up to but not over
the rounded edge. Slowly press the top into the bottom. (A small board can
help make it even.)
Step 5
Fill the stove about half full of alcohol. Light the burner by slowly
moving a match or lighter over the edge of the
burner.Note:If it does not stay lit, tip the burner up to
leak some fuel into the rim and re-light. Hold it until it stays lit or
gets too hot.
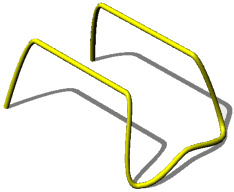
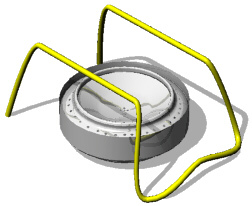
Step 6
Cut and straighten a coat hanger. Use a fine sandpaper to remove any
paint or coatings. Bend the coat hanger wire (or any large gauge wire)
into a shape that will hold a pot a few inches above the burner (see the
example). Note:with a little imaginations you can create
a number of stove bases
|